Guide to Develop Your First WordPress Theme


Guide to Develop Your First WordPress Theme
How to Create WordPress Theme from Scratch: Beginners Guide
You know HTML, CSS, and JavaScript. You can make attractive websites. Maybe you’ve known about WordPress but aren’t entirely sure how to implement it, or why you might need it. You worked with it before, but don’t know how to make your own theme from scratch. If you want something done right, you might have to do it yourself. While there are plenty of WordPress themes available, finding one that has the exact look and functionality you need can be difficult. In fact, you might be tempted to create your own theme instead.
In this guide, we’ll discuss how you can get started with theme development. We’ll then take you step-by-step through the process of creating a brand new custom theme.
First, you know what Is WordPress?
WordPress is an excellent website platform for a variety of websites. From blogging to e-commerce to business and portfolio websites, WordPress is a versatile CMS.
On a slightly more technical level, WordPress is an open-source content management system written in PHP licensed under GPLv2, which means that anyone can use or modify the WordPress software for free. A content management system is basically a tool that makes it easy to manage important aspects of your website – like content – without needing to know anything about programming. But in non-geek speak, it’s probably the easiest and most powerful blogging and website content management system (or CMS) in existence today.
Now you’re probably asking, “How do I get it?”
WordPress is free. Yep, that’s right – it’s 100% free.
WordPress can be downloaded for self-hosted installations from WordPress.org or it can also be used as a hosted service via WordPress.com.
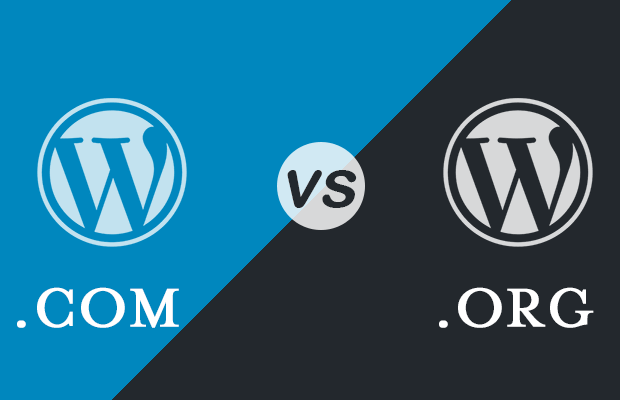
What’s The Difference Between WordPress.org and WordPress.com?
The self-hosted WordPress.org homepage
We’ve covered the difference between WordPress.org and WordPress.com in a lot more detail, but here’s the short version:
- WordPress.org, often called self-hosted WordPress, is the free, open-source WordPress software that you can install on your own web host to create a website that’s 100% your own.
- WordPress.com is a for-profit, paid service that is powered by the WordPress.org software. It’s simple to use, but you lose much of the flexibility of the self-hosted WordPress.
Most of the time, when people say “WordPress”, they mean the self-hosted WordPress available at WordPress.org. If you want to truly own your website, self-hosted WordPress.org is almost always the best option.
To create a WordPress theme, all you need is
Step 1: Set Up a Local Environment and Install WordPress Locally On Your Computer
Installing WordPress on localhost is quite easy. You cannot install WordPress on your computer directly. You have to create an environment then install WordPress on that.
If you have some technical background, you can skip the detailed steps in this tutorial. Here are the simplified steps on how to install WordPress on a local computer:
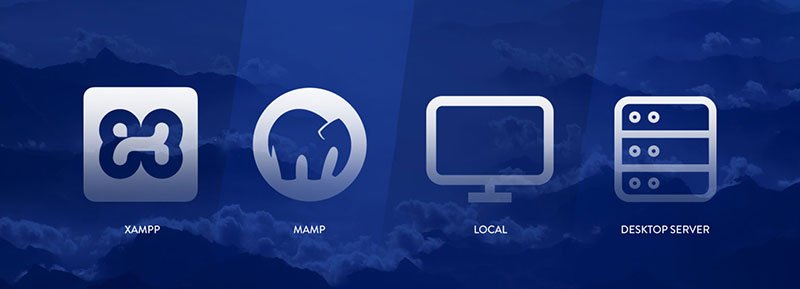
- Install a local server (Mac:MAMP, PC:XAMPP or WAMP).
- Create a new database.
- Download WordPress from organd extract the files to a new folder under the htdocs folder.
- Rename the wp-config-sample.phpfile to wp-config.php and update the database details according to your local server.
- Run wp-admin/install.phpand follow the instructions to install WordPress.
- Done!
Installing WordPress on your own Computer (Full tutorial)
Step 2: Download and Install Your Starter Theme
Like most starter themes, Underscores is very easy to get started with. In fact, all you need to do is to go the website and name your theme.
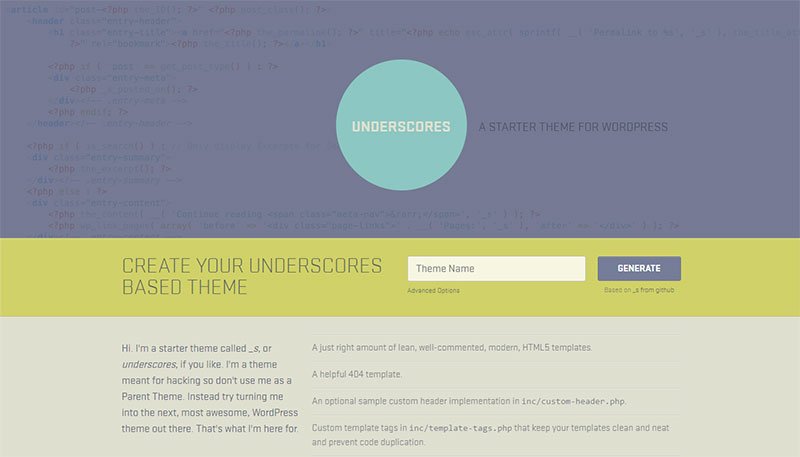
If you want, you can also click on Advanced Options to customize the base theme further. Here you can fill out more information, such as the author name, and give the theme description.
There’s also the _sassify! option, which will add Syntactically Awesome StyleSheets (SASS) files to your theme. SASS is a pre-processing language for CSS, which enables you to use variables, nesting, math operators, and more.
When you’ve made your choices, you can click on Generate, which will download a .zip file containing your starter theme. This is the core around which you’ll develop your own theme, so install it on your local site. Once you’ve installed your theme, you can preview your site to see how it looks. It’s very basic right now, but that won’t be the case for long!
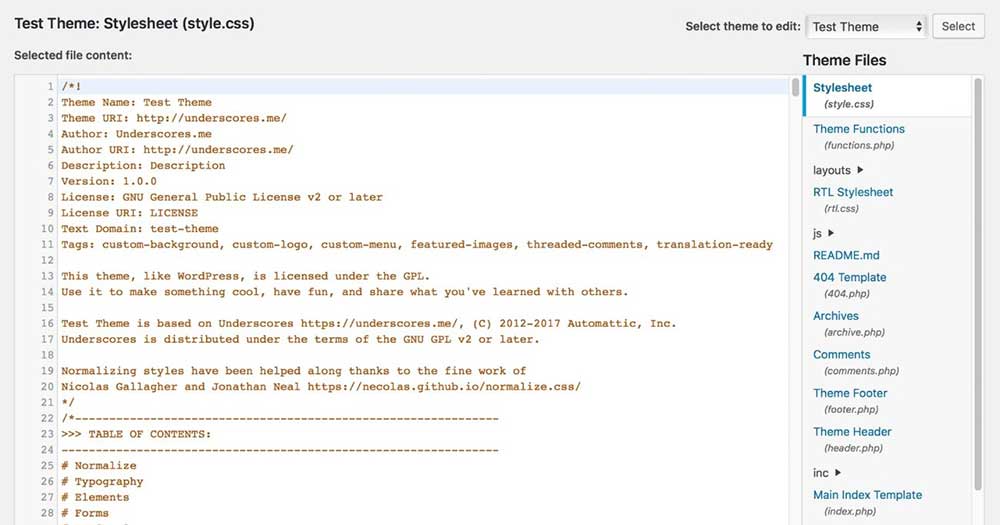
Step 3: Know WordPress Theme Files
Template files #Template files
WordPress themes are made up of template files. These are PHP files that contain a mixture of HTML, Template Tags, and PHP code.
When you are building your theme, you will use template files to affect the layout and design of different parts of your website. For example, you would use the header.php template to create a header, or the comments.php template to include comments.
When someone visits a page on your website, WordPress loads a template based on the request. The type of content that is displayed in by the template file is determined by the Post Type associated with the template file. The Template Hierarchy describes which template file WordPress will load based on the type of request and whether the template exists in the theme. The server then parses the PHP in the template and returns HTML to the visitor.
The most critical template file is index.php, which is the catch-all template if a more-specific template can not be found in the template hierarchy. Although a theme only needs an index.php template, typically themes include numerous templates to display different content types and contexts.
Template partials #Template partials
A template partial is a piece of a template that is included as a part of another template, such as a site header. Template partials can be embedded in multiple templates, simplifying theme creation. Common template partials include:
- header.php for generating the site’s header
- footer.php for generating the footer
- sidebar.php for generating the sidebar
While the above template files are special-case in WordPress and apply to just one portion of a page, you can create any number of template partials and include them in other template files.
Common WordPress template files #Common WordPress template files
Below is a list of some basic theme templates and files recognized by WordPress.
index.php
The main template file. It is required in all themes.
style.css
The main stylesheet. It is required in all themes and contains the information header for your theme.
rtl.css
The right-to-left stylesheet is included automatically if the website language’s text direction is right-to-left.
comments.php
The comments template.
front-page.php
The front page template is always used as the site front page if it exists, regardless of what settings on Admin > Settings > Reading.
home.php
The home page template is the front page by default. If you do not set WordPress to use a static front page, this template is used to show the latest posts.
header.php
The header template file usually contains your site’s document type, meta information, links to stylesheets and scripts, and other data.
singular.php
The singular template is used for posts when single.php is not found, or for pages when page.php is not found. If singular.php is not found, index.php is used.
single.php
The single post template is used when a visitor requests a single post.
single-{post-type}.php
The single post template used when a visitor requests a single post from a custom post type. For example, single-book.php would be used for displaying single posts from a custom post type named book. The index.php is used if a specific query template for the custom post type is not present.
archive-{post-type}.php
The archive post type template is used when visitors request a custom post type archive. For example, archive-books.php would be used for displaying an archive of posts from the custom post type named books. The archive.php template file is used if the archive-{post-type}.php is not present.
page.php
The page template is used when visitors request individual pages, which are a built-in template.
page-{slug}.php
The page slug template is used when visitors request a specific page, for example, one with the “about” slug (page-about.php).
category.php
The category template is used when visitors request posts by category.
tag.php
The tag template is used when visitors request posts by tag.
taxonomy.php
The taxonomy term template is used when a visitor requests a term in a custom taxonomy.
author.php
The author page template is used whenever a visitor loads an author page.
date.php
The date/time template is used when posts are requested by date or time. For example, the pages generated with these slugs:
http://example.com/blog/2014/
http://example.com/blog/2014/05/
http://example.com/blog/2014/05/26/
archive.php
The archive template is used when visitors request posts by category, author, or date. Note: this template will be overridden if more specific templates are present like category.php, author.php, and date.php.
search.php
The search results template is used to display a visitor’s search results.
attachment.php
The attachment template is used when viewing a single attachment like an image, pdf, or other media file.
image.php
The image attachment template is a more specific version of attachment.php and is used when viewing a single image attachment. If not present, WordPress will use attachment.php instead.
404.php
The 404 templates is used when WordPress cannot find a post, page, or other content that matches the visitor’s request.
Using template files #Using template files
Within WordPress templates, you can use Template Tags to display information dynamically, include other template files, or otherwise customize your site.
For example, in your index.php you can include other files in your final generated page:
- To include the header, use get_header()
- To include the sidebar, use get_sidebar()
- To include the footer, use get_footer()
- To include the search form, use get_search_form()
- To include custom theme files, use get_template_part()
Here is an example of WordPress template tags to include specific templates into your page:
| <?php get_sidebar(); ?>
<?php get_template_part( ‘featured-content’ ); ?> <?php get_footer(); ?> |
Step 4: Configure Your Theme
It’s easy to think that themes are purely for cosmetic purposes, but they actually have a huge impact on your site’s functionality. Let’s look at how you can make a few basic customizations.
Add Functionality with ‘Hooks’
Hooks are code snippets inserted into template files, which enable you to run PHP actions on different areas of a site, insert styling, and display other information. Most hooks are implemented directly into the WordPress core, but some are useful for theme developers as well.
Let’s take a look at some of the most common hooks and what they can be used for:
- wp_head() — Added to the <head> element in header.php, and enables styles, scripts, and other information that runs as soon as the site loads.
- wp_footer() — Added to footer.php right before the </body> tag. This is often used to insert Google Analytics code.
- wp_meta() — This usually appears in sidebar.php, to include additional scripts (such as a tag cloud).
- comment_form() — Added to comments.php directly before the file’s closing </div> tag to display comment data.
These will already be included in your Underscores theme. However, we still recommend that you visit the Hooks Database to see all available hooks and learn more about them.
Add Styles with CSS
Cascading Style Sheets (CSS) are what defines the appearance for all content on your site. In WordPress, this is accomplished using the style.css file. You’ll already have this file included in your theme, but at the moment it only contains the basic, default styling.
If you want a quick example of how CSS works, you can edit any of the styles here and save the file to see the effects.
For example:
| a { color: red; } |
Save the file, and check out your local site now. As you might expect, all unvisited links will now appear red.
Header.php file contains the code for a head part in which the js and style file is linked. It displays the header of the page.
| <link rel=”stylesheet” href=”<?php bloginfo(‘stylesheet_url’); ?>”> |
This line added after the title tells WordPress to load a style.css file that will handle the styling of the website.
Step 5: Create a WordPress Theme from Scratch by Coding
1. header.php File
You will put this code in the header.php file.
| <html>
<head> <title>Tutorial theme</title> <script type=”text/javascript” src=”<?php echo get_stylesheet_directory_uri().’/js/jquery.js’; ?>”> </script> <script type=”text/javascript” src=”<?php echo get_stylesheet_directory_uri().’/js/jquery-ui.min.js’; ?>”> </script> <script type=”text/javascript” src=”<?php echo get_stylesheet_directory_uri().’/js/bootstrap.js’; ?>”> </script> <link rel=”stylesheet” href=”<?php echo get_stylesheet_directory_uri().’/css/bootstrap.css’; ?>”> <link rel=”stylesheet” href=”<?php bloginfo(‘stylesheet_url’); ?>”> </head> <body> <div id=”ttr_header” class=”jumbotron”> <h1>HEADER</h1> </div> <div class=”container”> |
Header.php file contains the code for a head part in which the js and style file is linked. It displays the header of the page.
| <link rel=”stylesheet” href=”<?php bloginfo(‘stylesheet_url’); ?>”> |
This line added after the title tells WordPress to load a style.css file that will handle the styling of the website.
Here,
| <?php bloginfo(‘stylesheet_url’); ?> |
is a WordPress function that actually loads the stylesheet.
| <link rel=”stylesheet” href=”<?php echo get_stylesheet_directory_uri().’/css/bootstrap.css’; ?>”> |
Here, the Bootstrap is used as it is the best-known framework for responsive websites. It provides inbuilt css files to style your website. You can download it and keep the bootstrap “.css” file in your theme/css folder.
Next, a “div” with class ttr_header is added which will be the main container of the website. You will set a class for it so that you can modify it via the style.css file.
After that, you will add a simple label HEADER in a “div id” with class “ttr_header” which will be later specified in the class “jumbotron”.
2. index.php File
The main file index.php will contain this code
| <?php get_header(); ?>
<div id=”ttr_main” class=”row”> <div id=”ttr_content” class=”col-lg-8 col-sm-8 col-md-8 col-xs-12″> <div class=”row”> <?php if (have_posts()) : while (have_posts()) : the_post(); ?> <div class=”col-lg-6 col-sm-6 col-md-6 col-xs-12″> <h1><?php the_title(); ?></h1> <h4>Posted on <?php the_time(‘F jS, Y’) ?></h4> <p><?php the_content(__(‘(more…)’)); ?></p> </div> <?php endwhile; else: ?> <p><?php _e(‘Sorry, no posts matched your criteria.’); ?></p> <?php endif; ?> </div> </div> <?php get_sidebar(); ?> </div> <?php get_footer(); ?> |
The very first line of code in this file
| <?php get_header(); ?> |
will include the header.php file and the code in it are on the main page.
| <?php if (have_posts()) : while (have_posts()) : the_post(); ?>
<div class=”col-lg-6 col-sm-6 col-md-6 col-xs-12″> <h1><?php the_title(); ?></h1> <h4>Posted on <?php the_time(‘F jS, Y’) ?></h4> <p><?php the_content(__(‘(more…)’)); ?></p> </div> <?php endwhile; else: ?> |
The above code displays the main content of the post that you have created through the WordPress administrative area.
Next, you will include the sidebar.php file like this
| <?php get_sidebar(); ?> |
In this file, you can display your recent posts, archives, contact info etc.
After this line, an empty “div” inserted that will separate the Main Area and the Sidebar from the footer.
Finally, added one last line
| <?php get_footer(); ?> |
which will include the footer.php file.
3. Sidebar.php File
In the sidebar.php, add the following code
| <div id=”ttr_sidebar” class=”col-lg-4 col-md-4 col-sm-4 col-xs-12″>
<h2 ><?php _e(‘Categories’); ?></h2> <ul > <?php wp_list_cats(‘sort_column=namonthly’); ?> </ul> <h2 ><?php _e(‘Archives’); ?></h2> <ul > <?php wp_get_archives(); ?> </ul> </div> |
In this file, internal WordPress functions are called to display the different Categories, Archives of posts. The WordPress function returns them as list items, therefore you have to wrap the actual functions in unsorted lists (the <ul> tags).
4. footer.php File
Add these lines to the footer.php file:
| <div id= “ttr_footer”>
<h1>FOOTER</h1> </div> </div> </body> </html> |
With this code, a simple FOOTER label will be added. You can also add links, additional text, the copyright information for your theme in place of plain Footer text.
5. style.css File
Add the following lines to the style.css file
| body
{ text-align: left; } #ttr_sidebar { border-left: 1px solid black; } #ttr_footer { width: 100%; border-top: 1px #a2a2a2 solid; text-align: center; } .title { font-size: 11pt; font-family: verdana; font-weight: bold; } |
This CSS file sets the basic looks of your theme. These lines set the background of the page and surround the main parts of your site with borders as per your need.
Your page will look like this
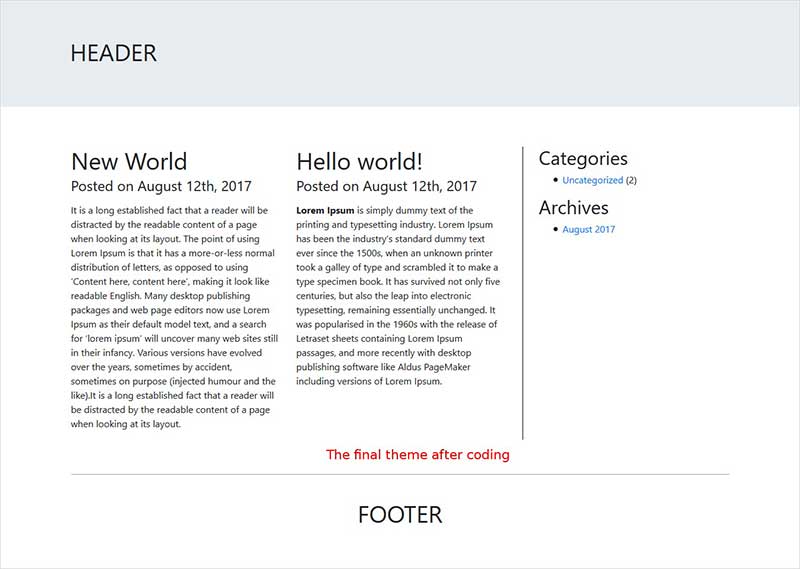
Now, you can further modify the CSS file, add images, animations and other content to your theme to get the looks you want for your blog!
But, this will require the HTML, PHP and WordPress functions knowledge.
Step 6: Export the Theme and Upload It to Your Site
When you’ve finished tinkering with your theme, it’s time to make sure it works properly. You can ensure this by testing the theme. To quickly make sure that your theme will perform well under most circumstances, you can use the Theme Unit Test data. This is a set of dummy data you can upload to your site, containing many different variations of styles and content. It will enable you to see how your theme copes with unpredictable data.
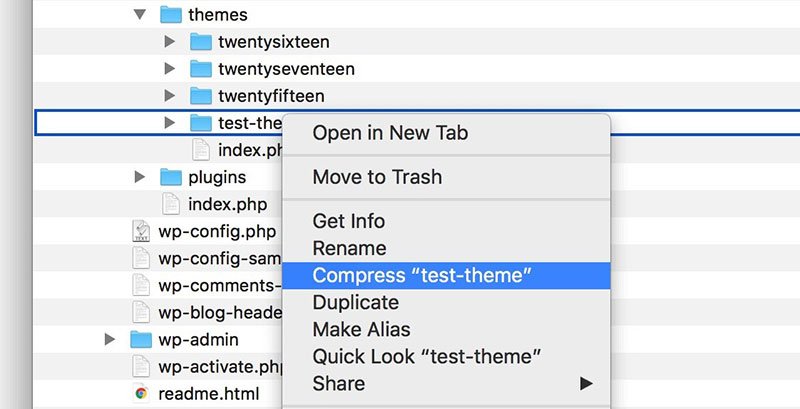
When you’ve thoroughly tested your theme and are convinced that it meets the required standards, all that remains now is to export it. The easiest way to do this is simply to find where the website is installed on your local machine, most likely in a folder called Websites inside your default Documents directory. Open the website’s folder and access /wp-content/themes/, where you’ll find your theme.
You can now use a compression tool, such as WinRAR, to create a .zip file based on the folder. Simply right-click on the folder and select the option that enables you to zip it, such as Compress “folder.”
When the folder has been zipped, it’s ready to be uploaded and installed on any WordPress site, just as you installed your Underscores theme at the start. If you feel particularly happy with the result, you could even submit your theme to the WordPress Theme Directory.
Recommended Posts
Things to Do Before Updating WordPress
March 16, 2020
5 Best HTML Code Editor Software Tools – 2019
December 13, 2019
Responsive Web Design – What It Is And How Does Work
April 24, 2019

Education Management System
for School, College & University
Take your educational institutes to the next level